
Even though we store more and more data in the cloud, drive mapping is still a common practice these days. Network drive mapping lets you easily access files and folders stored on network drives and servers.
Drive mapping can be done with a Group Policy (GPO), PowerShell, and manually in Windows. The advantage of mapping network drive is that you can access the files normally through your explorer. This way you can open and save your files from any application in the desired location.
In this article, I will explain how you can create a group policy for drive mapping or manually add a network drive in Windows.
Drive Mapping with GPO
The most common way the map network drive is with a Group Policy (GPO). The advantage of a GPO is you can easily manage, create and change multiple drive maps. It also allows us to configure different drive maps depending on the device or user with the help of Item-level targeting.
When creating a new policy we can choose to link it to a user’s OU or computer OU. The difference between the two is:
- User’s OU – It doesn’t matter on which device the user logs in, the user will always get the drive mapping
- Computers OU – The drive mapping is tied to the computer, each user that logs in on the computer gets the mapped drive.
With drive mapping policies, however, it’s best practice to create only a single policy for all drive maps. We can use item-level targeting per drive map to give only the selected users, groups, or computers access to the drive map.
The advantage of this method is that it’s easier to process during login for the client computers and easier to manage. Because you will have all drive mappings in one overview, instead scattered around in different policies. So create your new drive mapping policy in a high-level OU, for example, Users, or Computers.
Creating a GPO Drive Map
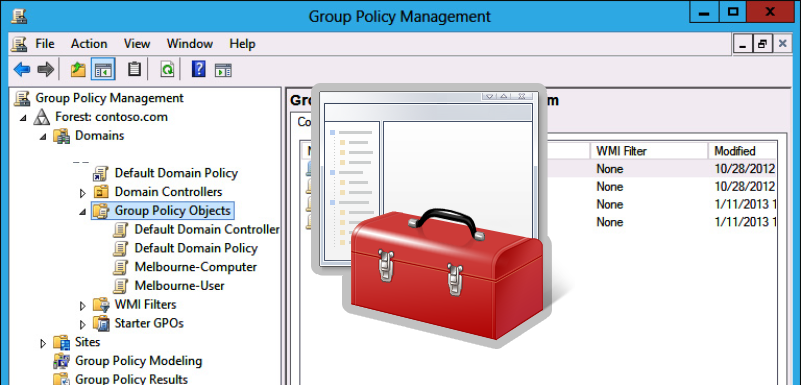
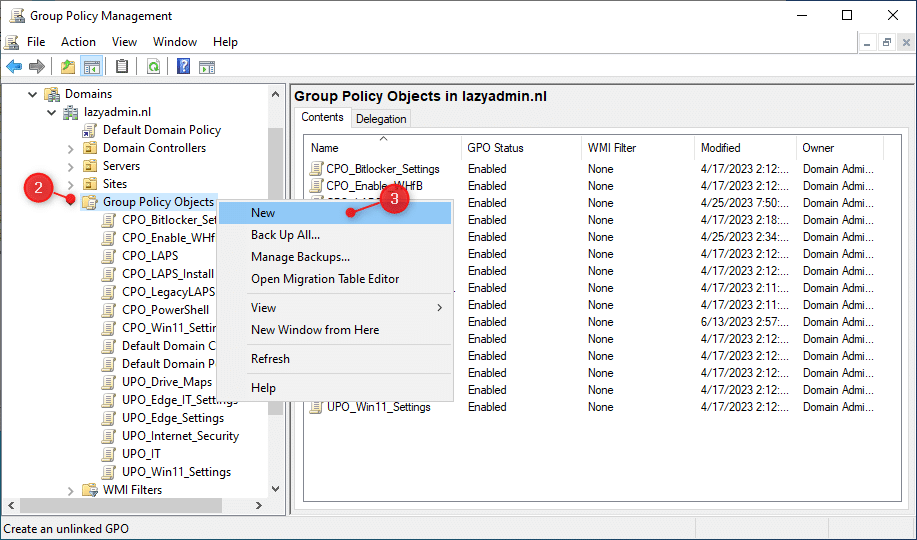
- On the domain controller, open the Group Policy Management
- Expand your domain and open the Group Policy Objects container
- Right-click on the container and choose New
Note
I begin the names of the my policies with either UPO (User Policy Object) or CPO (Computer Policy Object). This way you can easily identify is the policy is an user or computer policy.
- Give the policy a name, for example, UPO_Drive_MAPS
- Edit the new policy (right-click on it and choose Edit)
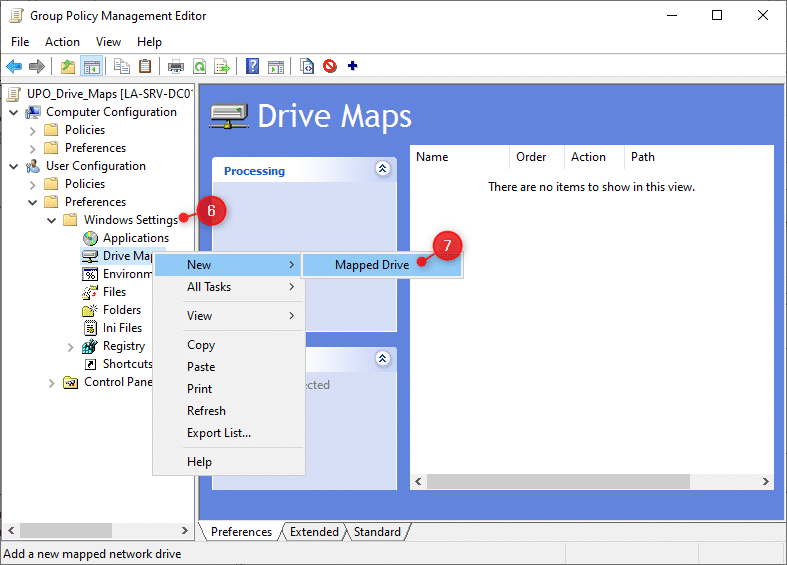
- Expand Preferences > Windows Settings under the User Configuration.
- Right-Click on Drive Maps and choose New > Mapped Drive
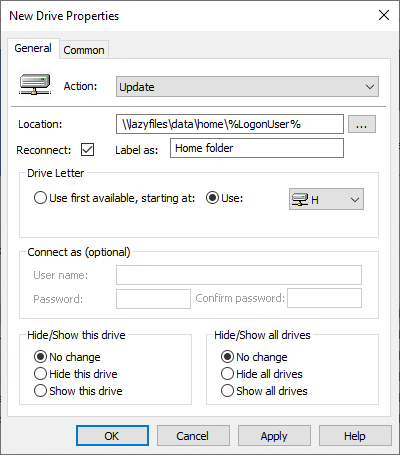
In the New Drive Properties dialog, we will need to configure a couple of options. The first one is the action. Let me explain the differences between each action:
- Create – Creates a new mapped drive
- Replace – Recreate a mapped drive. If it doesn’t exist, it will create it. Otherwise, it will overwrite the existing drive mapping.
- Update – Modify an existing mapped drive or create it. The difference between Replace and Update is that it only updates the settings defined within the preference item. All other settings remain as configured on the mapped drive.
- Delete – Removes a mapped drive
The best option is to use Update when creating the mappings. This way you are always sure that the user will have the correct drive mapping. The potential problem with Replace is that it may disconnect the drive briefly every 90 mins during the GPUpdate cycle. This can cause problems with specific applications.
Tip
Create a CNAME record in the DNS server for the file server. The CNAME record is an alias and makes it easier to move the shared folders to a new server later on.
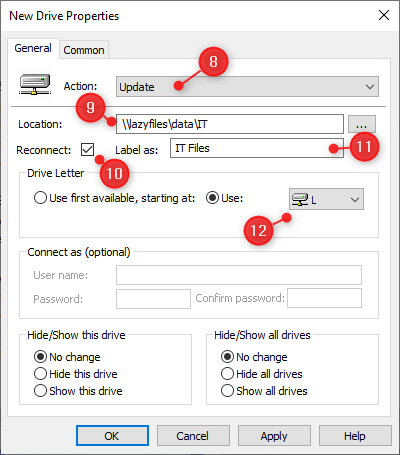
- Set the action to Update
- Enter the location of the share
- Make sure Reconnect is enabled
- Optional, enter a label for the folder
- Assign a drive letter. I prefer to use a fixed letter, users tend to remember drive letters better 😉
The option Hide/Show this drive in the lower left corner allows you to create hidden drive mappings. This can be useful when you need to create a drive mapping for an application, but don’t want to give the user direct/easy access to it. Hidden drives can still be accessible by the applications (although I recommend just use the UNC path in the application if possible)
Item-level targeting
We will now need to configure the Item-level targeting and enable the user security context for the mapped drive. The first will make sure that the drive mapping is applied to the user’s account. The Item-level targeting ensures that only specific users or devices gain access to the drive mapping, instead of all users.
Good to know is that you can re-use drive letters when using Item-level targeting.
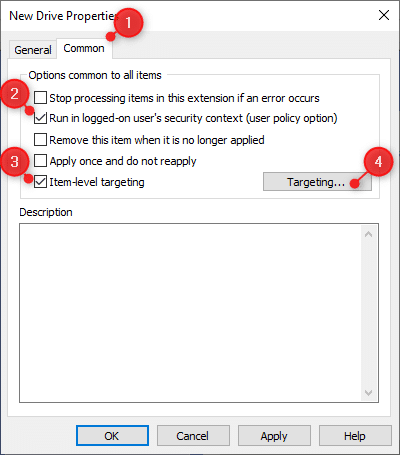
- Click on the Common tab
- Enable Run in logged-on user’s security context
- Enable Item-level targeting
- Click on Targeting…
Targeting can be done on a lot of conditions and we can even apply multiple conditions with AND or OR statements. The most common however is to apply the mapping based on Security Groups, OU, or specific users.
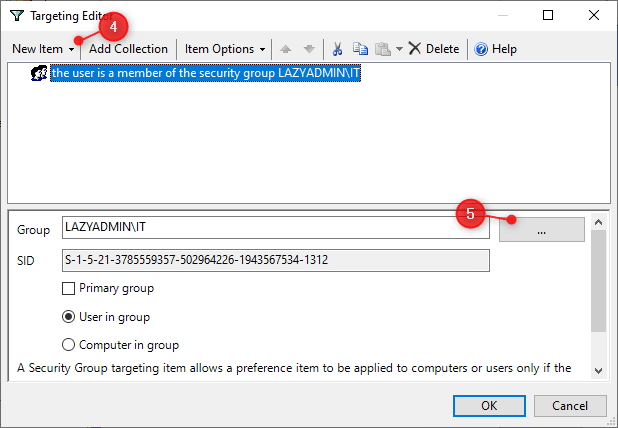
For example, to give all users that are members of the IT security group access, we can configure the following:
- In the Targeting Editor click on New Item
- Choose Security Group
- Select the security group from the Active Directory
As mentioned, we target multiple groups. Let’s say we want to map the network drive to not only members of the IT department but also Management.
- Click again on New Item and select Security Group
- Select the group Management in this case
- With the management row selected, click on Item Options and choose OR

The mapping will now be applied to users that are either members of the IT or management security group.
Advanced Item-level Targeting
The item-level targeting also allows you to create collections. Collections are a group of rules that need to be true in order for the collection to be true. The advantage of collections is that you can create different combinations and test each of them.
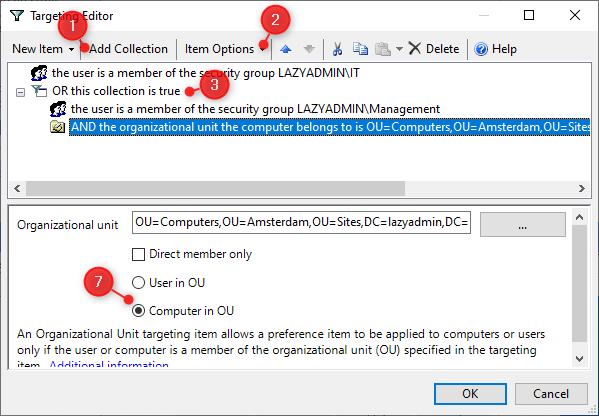
For example, we want to create a drive mapping that is being applied to all IT members or to users that are members of the security group Management and are working on a computer in Amsterdam.
For the IT department, we can use a normal rule based on the security group. But of the management we will need to create a collection:
- Click on Add Collection
- Set the Item options to OR for the collection
- Right-Click on the collection and choose add targeting item > Security Group
- Select the managent security group
- Next, click again on the collection > add targeting item > Organization Unit
- This time select the OU with the computers in Amsterdam
- Make sure that you apply the rule to Computer in OU
Using Variables in Drive Mappings
Good to know, is that you can also use variables when creating drive mappings. For example, when you offer a home drive (personal folder) on the file server, then we can use the user’s logon name in the folder location path.
To see which variables are available, press F3 when you have the New Drive Properties dialog open. This will give you a list of all options that you can use. Always make sure that you enable the option Run in logged-on user’s security context under the Common tab.
Assing the new GPO
After you have created the new GPO, we will need to verify it, optimize, test, and assign the policy. The first step is to verify the settings. Open the Settings tab of the GPO and verify the configuration.
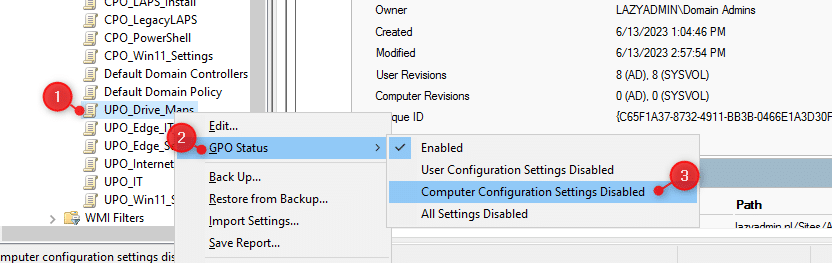
The next step is to optimize the performance of the GPO. In this case, we create a policy with only user settings. To speed up the group policy processing time we can disable the computer configuration for this policy:
- Right-click on the new policy
- Choose GPO Status
- Select Computer Configuration Settings Disabled
The last step is to assign the policy. Important is to always test your new policy with a small group of users or computers. After you have verified that it’s working correctly, you can assign it to all the users that need the policy.
To assign the policy, simply navigate to the OU where you want to assign the policy, right-click on the OU and choose Link an Existing GPO. Select the newly created policy from the list to assign it.

Map Network Drive in Windows 11
You can also manually map a network drive in Windows 11. This is particularly handy when you only need to map the drive temporarily or in home network environments where you don’t have a domain controller of course.
Mapping a network drive in Windows 11 is pretty easy: (you can find the steps for Windows 10 in this article)
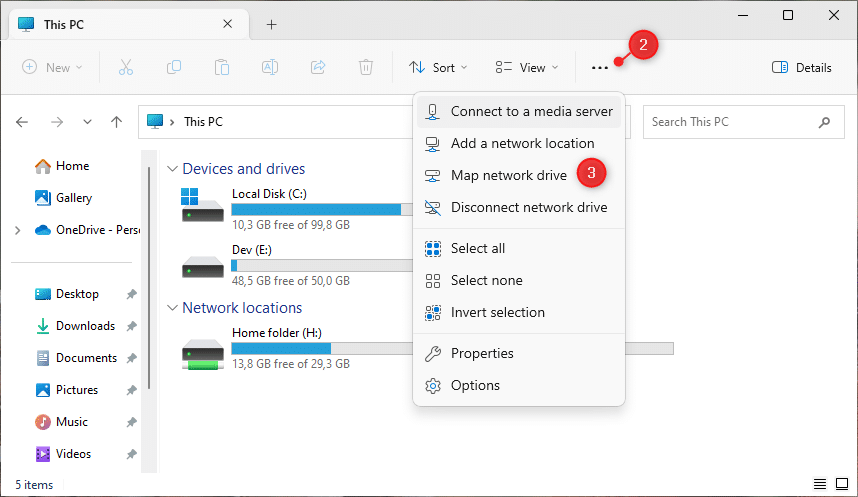
- Open the Explorer
- Click on the 3 dots (more options)
- Choose Map network drive
In the next screen, we can configure the drive letter and network folder to open. Make sure that Reconnect at sign-in is checked, otherwise, you will need to re-add the drive letter if you have logged in.
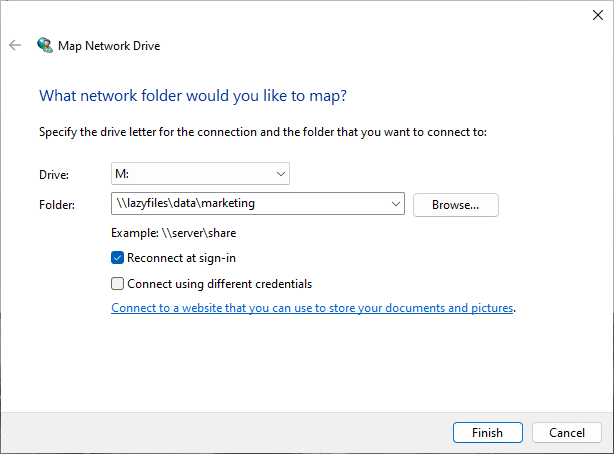
The option Connect using different credentials allows you to make a network connection to a shared folder with different credentials. For example, when you have a NAS, you will sometimes need to enter the credentials of the NAS in order to open the shared folder.
Verifying Drive Mappings
Drive mappings are applied after the next policy update, which occurs roughly every 90 min, but you can also for the update with the command GPUpdate. The easiest way to verify the drive mappings is to open the explorer. But that doesn’t work for hidden drive mappings.
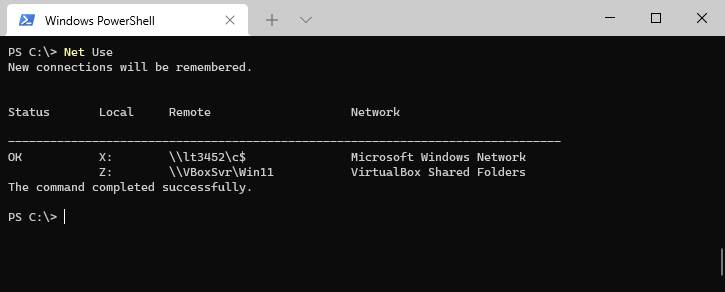
In these cases, you can use the command Net Use. When you run this command in the command prompt or PowerShell, you will get an overview of all mapped network drives, the drive letter, and the network folder.
If the policy isn’t applying, then verify the policy with the RSOP utility This built-in tool allows you to verify group policy and find any problems that might have occurred in the background.
Wrapping Up
Using one Group Policy for all your drive mappings based on item-level targeting is the best practice to follow. It makes it easier to manage your mappings and it will speed up the logon process.
If you need to map a lot of network shares, then it’s sometimes better to map the parent folder and give the correct permissions on each subfolder, instead of mapping each subfolder.
I hope you found this guide useful, if you have any questions, just drop a comment below!