

The Start Menu search feature is used more often in Windows 10 and 11 than in previous OS versions. You can use Windows Start Menu search to quickly find an app, file, setting item, system feature, or even to search the Web. However, in some cases, Windows search may stop working. When you try to find an app or a file, an empty list of search results is returned. Here are some basic tips that should help if Windows search is not working properly in the Start Menu, Cortana, Taskbar, or other elements of the interface.
Restart Windows Search Services
One of Cortana’s executable files, SearchUI.exe, is responsible for searching from the taskbar. If the search in the Windows 10/11 taskbar is not working for you, try restarting the process:
- Run the Task Manager (
Ctrl+Alt+Del); - Go to the Details tab;
- Find SearchUI.exe in the list of processes, right-click on it and select End Task;

- Similarly, kill the SearchApp.exe and SerchIndexer.exe processes;
- The next time you try to use Windows 10 search, these processes will start automatically.
If the search doesn’t work only in the Windows 10/11 Start Menu, try the following solution:
- Kill the File Explorer (Explorer.exe) process by right-clicking an empty space on the taskbar while holding down the right
Ctrl+Shiftkeys -> Exit Explorer or use the Task Manager (Ctrl + Shift + Esc);
- Run the Registry Editor from the Task Manager (File -> Create new task -> regedit.exe);
- Delete the following registry key:
HKLMSOFTWAREMicrosoftWindowsCurrentVersionExplorerFolderTypes{ef87b4cb-f2ce-4785-8658-4ca6c63e38c6}TopViews{00000000-0000-0000-0000-000000000000}. In Windows 10 x64 you need to delete another registry keyHKLMSOFTWAREWow6432NodeMicrosoftWindowsCurrentVersionExplorerFolderTypes{ef87b4cb-f2ce-4785-8658-4ca6c63e38c6}TopViews{00000000-0000-0000-0000-000000000000}. - Start Explorer.exe using the Task Manager (File -> Create new task -> explorer.exe).

Windows 10 1703 and newer builds have another common problem that results in the search function not working. Enable the option Let apps run in the background in the Settings -> Privacy -> Background apps. If you disable this option, the search among the newly installed apps may not work.

If you didn’t find this option in the modern Settings app, you can enable it through the registry:
- To do it, go to the registry key HKEY_CURRENT_USERSoftwareMicrosoft WindowsCurrentVersion BackgroundAccessApplications;
- Create a new DWORD (32-bit) parameter with the name GlobalUserDisabled and the value 0;
- Then change the value of the BackgroundAppGlobalToggle parameter to 1 in the registry key HKCUSoftwareMicrosoftWindowsCurrentVersionSearch;Or you can change these parameters from the command prompt:
REG ADD HKCUSoftwareMicrosoftWindowsCurrentVersionBackgroundAccessApplications /v GlobalUserDisabled /t REG_DWORD /d 0 /f

REG ADD HKCUSoftwareMicrosoftWindowsCurrentVersionSearch /v BackgroundAppGlobalToggle /t REG_DWORD /d 1 /f - Restart your computer.
Check the Search Service and Indexing Settings in Windows
Check if the Windows Search service is running.
- Open the
services.mscconsole; - Find Windows Search in the list of services;
- Make sure that the service is running and its startup type is set to automatic;
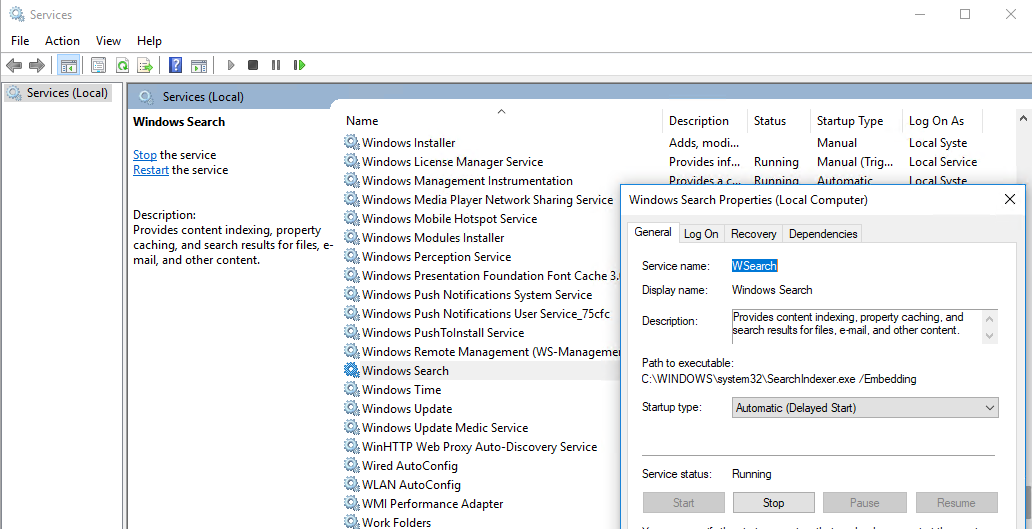
- Start/restart the WSearch service;
- Open the classic Control Panel and click the Indexing Options item (Control PanelAll Control Panel ItemsIndexing Options);
- Make sure that you select the indexing of all necessary locations (at least the following indexing locations should be enabled: Start Menu, Users folder. Also, you can add your local drives and Outlook);
- Click Advanced button and then press Rebuild in the Troubleshooting section;
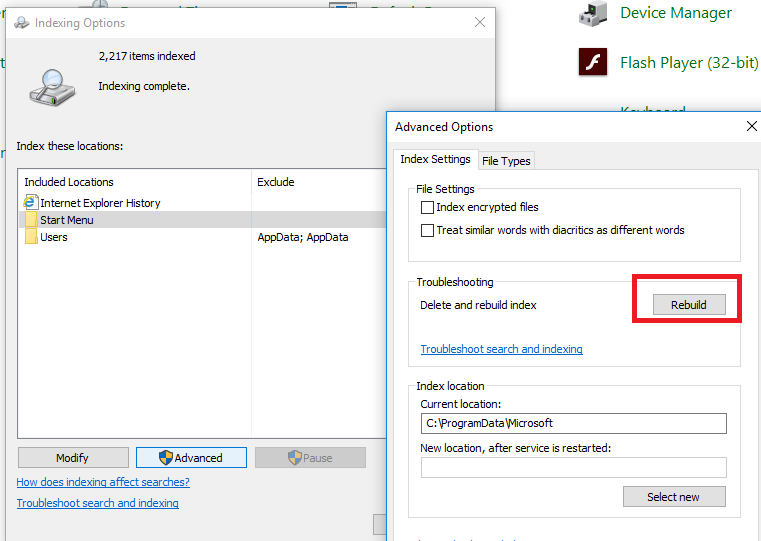
- The reindexing process can take quite a long time. Wait for it to finish.
Note. Check that there is enough free space on your system drive. In some cases, the size of the Windows Search indexing file (Windows.edb) can be quite large.
Fix and Repair with Search and Indexing Troubleshooter
Try using the built-in Indexer Diagnostics (Troubleshooter) tool to find and fix common problems with Windows Search. For this:
- Go to Settings -> Search -> Searching Windows. Scroll down the list and click on “Run the indexer troubleshooter to resolve common search issues”;You can start the Windows Search troubleshooter from the command prompt:
msdt.exe -ep WindowsHelp id SearchDiagnostic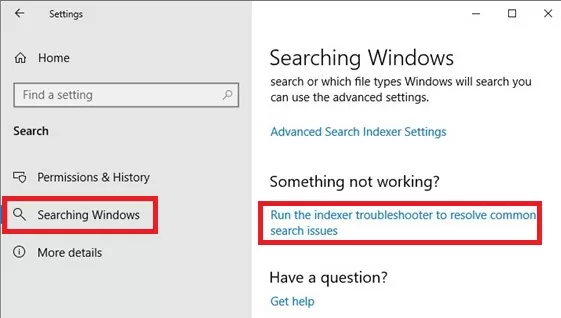
- The “Search and Indexing Services” troubleshoot wizard should launch;
- Select your problem (most likely it will be “Files don’t appear in search results”) and click Next;

- Wait until the “Search and Indexing troubleshooter” scans your computer and tries to fix the errors. Then reboot the computer and check the search result.
Reset Microsoft Store Universal Apps in Windows
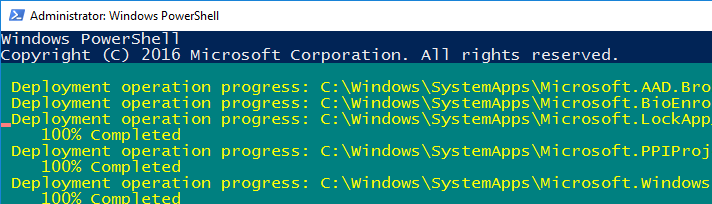
If you have the Cortana voice assistant app installed on your computer, you can fix the search problem by re-registering all Universal Windows Platforms (UWP) Microsoft Store apps in the system. To do it, run the following command in the elevated PowerShell console:
Get-AppXPackage -AllUsers | Foreach {Add-AppxPackage -DisableDevelopmentMode -Register "$($_.InstallLocation)AppXManifest.xml"}
After the command is finished, reboot the computer.
If that doesn’t fix your search issue, you need to completely re-install Microsoft.Windows.Search universal app (Microsoft.Windows.Search_cw5n1h2txyewy).
- Run the
powershell.exeas administrator; - Stop the Windows Search service. First, you need to change the startup type to Disabled, and then stop it:
Get-Service WSearch| Set-Service –startuptype disabled –passthru| Stop-Service –Force - Restart Windows;
- Remove the universal Search app:
Get-AppxPackage -Name *Search* | Remove-AppxPackage -Verbose -ErrorAction SilentlyContinue -WarningAction SilentlyContinue

Get-AppxPackage -AllUsers -Name *Search* | Remove-AppxPackage -Verbose -ErrorAction SilentlyContinue -WarningAction SilentlyContinue - Now you need to delete the application folder
%LOCALAPPDATA%PackagesMicrosoft.Windows.Search_cw5n1h2txyewy. For this, you must change the owner of the folder to the local Administrators group. This can be done manually in Windows Explorer (Security tab in folder options) or using the following PowerShell script:
$searchapp_path ="$env:localappdataPackagesMicrosoft.Windows.Search_cw5n1h2txyewy"

$Account = New-Object -TypeName System.Security.Principal.NTAccount -ArgumentList 'BUILTINAdministrators';

$ItemList = Get-ChildItem -Path %searchapp_path -Recurse;

foreach ($Item in $ItemList) {

$Acl = $null;

$Acl = Get-Acl -Path $Item.FullName;

$Acl.SetOwner($Account);

Set-Acl -Path $Item.FullName -AclObject $Acl;

} - Now you can delete Windows.Search_cw5n1h2txyewy folder:
Remove-Item -Path $env:localappdataPackagesMicrosoft.Windows.Search_cw5n1h2txyewy –force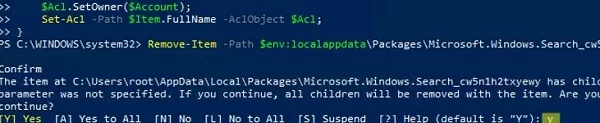
- Now search in Windows is completely disabled;
- Reinstall the universal Search app:
Get-AppxPackage -AllUsers -Name *Search* | % {Add-AppxPackage -Path ($_.InstallLocation + "Appxmanifest.xml") -Register -DisableDevelopmentMode -ForceApplicationShutdown -Verbose}
- Enable autostart for the WSearch service:
Set-Service WSearch –startuptype automatic - Restart Windows, log in with your account, and check that the search is now working.
Blank Search Results on Windows with Bing Search Enabled
On February 5, 2020, many users noticed the search from the Start Menu and taskbar stopped working in Windows 10. When you click the Search icon or type something in the Start menu, it shows blank search results.

This issue has been acknowledged by Microsoft and was caused by the unavailability of Bing cloud search services. By default, Windows 10 and 11 send everything that you type in the Start Menu search bar to Microsoft servers, which return you search results from Bing.
The easiest way to fix this problem is to disable Windows Search Integration with Microsoft Bing Search services.
- Run the Registry Editor (Win+R ->
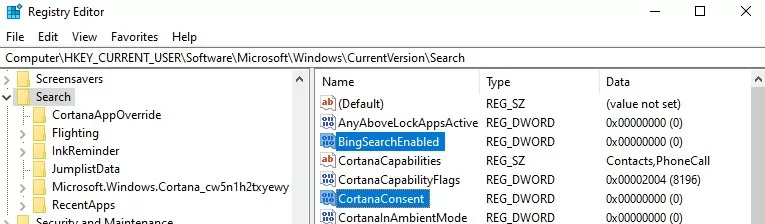
regedit.exe); - Go to the registry key HKEY_CURRENT_USERSOFTWAREMicrosoftWindowsCurrentVersionSearch;
- Change the value of the BingSearchEnabled and CortanaConsent parameters to 0;
 If these registry settings are missing, create them manually (use the REG_DWORD 32 parameter type). You can create and set these parameter values with the following commands:
REG ADD HKCUSoftwareMicrosoftWindowsCurrentVersionSearch /v BingSearchEnabled /t REG_DWORD /d 0 /fOr enable the Group Policy option Don’t search the web or display web results in Search under Computer Configuration > Policies > Administrative Templates > Windows Components.
REG ADD HKCUSoftwareMicrosoftWindowsCurrentVersionSearch /v CortanaConsent /t REG_DWORD /d 0 /f - Restart the Explorer.exe process or reboot your computer.
This solution will help if you have a search box open, but nothing appears you enter the text to search. At the time of writing this post, Microsoft engineers had already fixed the problem with Bing, and Windows Search Services are working fine. Although in my opinion, the integration of Windows search with Bing service should be permanently disabled immediately after installing the operating system.
Settings Search Not Working in Windows 10 or 11
Windows 10/11 Settings app has its own search box for quickly jumping to system settings items. If the search in the Settings menu stops working:
- Open the File Explorer and go to the directory
%LocalAppData%Packageswindows.immersivecontrolpanel_cw5n1h2txyewyLocalState; - Open the properties of the Indexed folder and click the Advanced button. Make sure that the option “Allow files in this folder to have contents indexed in addition to file properties” is enabled;
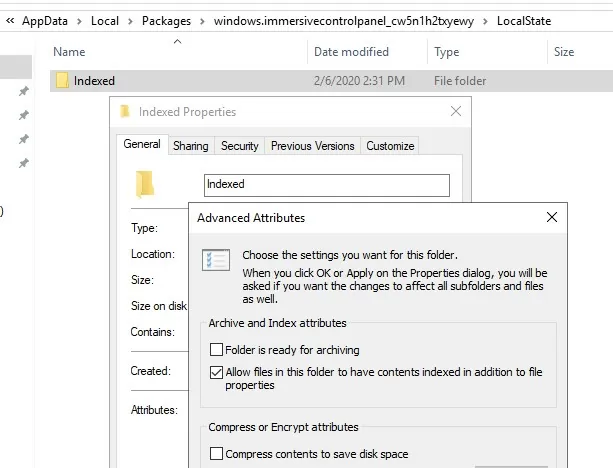
- If the option is already enabled, disable it, click OK, and then re-enable it.
Reset Windows Search with PowerShell Script
If the above methods didn’t help you to restore search functionality in Windows 10/11, Microsoft recommends using a PowerShell script to reset all Windows Search service settings (the script is for Windows 10 1903 and newer).
To run this script you need:
- Download the ResetWindowsSearchBox.ps1 script http://www.microsoft.com/download/100295;
- Open the PowerShell console as an administrator;
- Change the PowerShell Execution Policy settings with the command (this command only allows you to run PS1 scripts in the current powershell.exe session):
Set-ExecutionPolicy -Scope Process –ExecutionPolicy Unrestricted - Run the PS1 script file;

- The script will reset the Windows search settings to default values;
- Restart your computer and check if the Windows search issue is fixed.
Some additional ways to fix search issues in Windows that might help if the previous options didn’t work for you: