How to Convert ESD to WIM File on Windows
In this tutorial, we will show you how to convert ESD to WIM file from the Command prompt, using the DISM tool, or PowerShell scripts. ESD file is a new highly compressed image distribution format developed by Microsoft. The ESD (Electronic Software Download) image files are used to deploy the Windows operating system instead of the classical WIM (Windows Imaging Format) image. Unlike WIM files, you cannot open or mount an ESD file in Windows directly (unless you’re converting them). The ESD file is read-only. The problem is that many administrators use WDS/MDT/SCCM to deploy Windows over the network and usually need to make the same changes to the Windows Image file. Today we will show you how to easily convert the install.ESD file from the Windows 11 installation media to WIM image format.
What are the ESD and WIM Image Formats?
First, we’ll figure out what the install.wim and install.esd files are and how they differ.
Install.esd and install.wim are archives containing compressed operating system files that can contain several Windows editions (Professional, Home, Enterprise, etc.). When you install Windows, all the files from the install.wim/esd image are extracted to the system drive of the computer.
If you compare the size of the wim and esd file, you can notice that the size of a file with the ESD extension is smaller, because it is more compressed. The more efficient LZMS compression algorithm is used to compress ESD files instead of the LZX compression used for WIM files. LZMS compression allows the install.esd file to be 30% smaller than the install.wim file.
Microsoft distributes the latest Windows 10 and 11 builds in the install.esd format. It helps users to save network traffic during upgrading Windows build, or when downloading installation images using the Media Creation Tool.
The inconvenience of using the install.esd file is that DISM (Deployment Image Servicing and Management) tool refuses to mount this Windows image. Accordingly, you cannot modify the ESD image by injecting drivers, security updates, or changing some Windows deployment options. In this case, you should convert the install.esd file to install.wim and then work with just the install.wim file.
You can convert ESD to WIM and vice versa using the built-in DISM tool. Four different compression formats can be used in DISM to compress a WIM image. For each of them there is a corresponding option in the DISM /Compress parameter:
- /Compress:none — no compression used;
- /Compress:fast — default WIM image compression type (XPRESS compressions);
- /Compress:maximum — maximum compression (LZX compression);
- /Compress:recovery — this type of compression converts WIM image to ESD format (LZMS compression).
Extract the Install.esd File From the Windows 10/11 ISO
You can create Windows 10 or 11 installation ISO image using the Media Creation Tool or the Windows 10 Upgrade assistant.
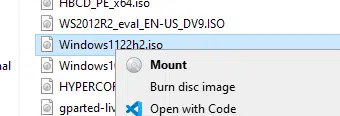
Once you have downloaded the Windows ISO image to your computer, you will need to mount it. Open the File Explorer, right-click your Windows ISO image and select Mount.
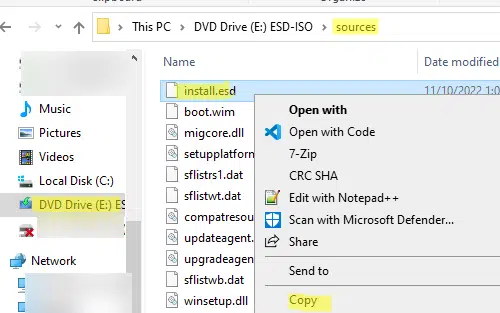
After that, a new virtual DVD drive will appear in File Explore (in our case, it is assigned the letter E:). Navigate to the E:Sources folder, find the install.esd file and copy it to your local drive (e.g. C:ESD).
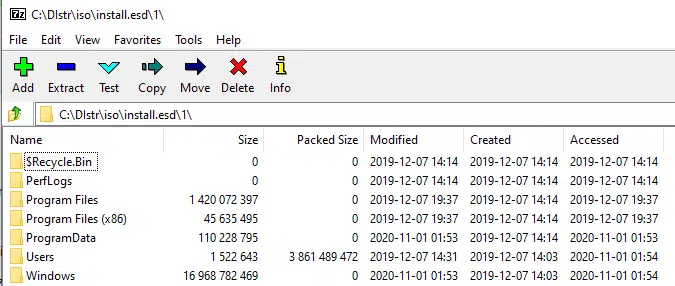
Hint. How to Open an ESD File? You can view the contents of install.esd using the archiver tools. For example, using the 7 zip. Just open the esd file with the 7zip archiver and you will be able to browse the folders in the esd file.
Converting ESD to WIM File Using DISM on Windows
The next thing you need to do is open Command Prompt as Administrator. We need to get into the folder we have just created. Type in:
cd c:esd

As mentioned above, the install.wim or install.esd file can more than one edition of Windows. Each edition of the OS is stored in the file install.esd file and has an assigned index (index 1, 2, 3, 4, …). You can get the list of Windows editions in your install.esd file using the DISM tool. Use the command to list the editions of Windows available in your image:
dism /Get-WimInfo /WimFile:install.esd
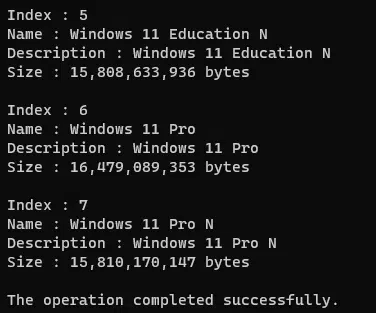
In our case, the install.esd file contains 7 editions of Windows 11, indexed from 1 to 7. Find the index number of Windows edition you need (we are choosing Index 6, since we are using the Windows 11 Pro edition).
Note. Learn how to convert EXE to MSI.
You can now extract the specified Windows edition installation image from the esd file and convert it to the WIM file format
dism /export-image /SourceImageFile:install.esd /SourceIndex:1 /DestinationImageFile:install.wim /Compress:max /CheckIntegrity
Image export will start and the process may take a long time. Converting is quite a resource-intensive task, during which the processor and memory of your computer will be heavily loaded. Depending on your computer hardware, it takes about 10-30 minutes to complete.
In this example, we use the CheckIntegrity option when converting a file to WIM. If the source ESD file is damaged or contains errors, the conversion process will be cancelled.

Wait until the message appears:
Exporting image
[==========================100.0%==========================]
The operation completed successfully.

You can extract more than one edition of Windows from the esd to the install.wim file. For example, to create a WIM image file with Home (index:1) and Pro (index:6) Windows 11 edition, you can use the following commands:
dism /Export-Image /SourceImageFile:install.esd /SourceIndex:6 /DestinationImageFile:install.wim /DestinationName:"W11 PRO 22H2" /Compress:max /CheckIntegrity

Dism /Export-Image /SourceImageFile:install.esd /SourceIndex:1 /DestinationImageFile:install.wim /DestinationName:"Win11 Home 22H2"
In the same way, you can add any other Windows edition to your wim file.
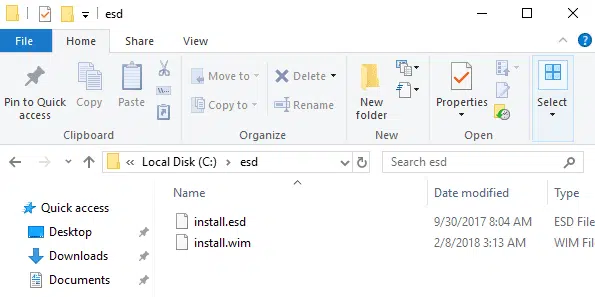
Now you can copy your new WIM image to your distribution media (USB flash, ISO image) or import it to MDT/WDS. You can delete the original install.esd file in the Sources folder and use the install.wim file instead.
Convert ESD to Install.WIM with PowerShell
Also, you can use the PowerShell cmdlets to convert your ESD file to the WIM image format.
Run the elevated PowerShell console and execute the following command to list the Windows editions in the install.esd file:
Get-WindowsImage -ImagePath "f:sourcesinstall.esd"

Now you can use the Export-WindowsImage cmdlet to convert Install.ESD to Install.WIM l:
Export-WindowsImage -SourceImagePath F:sourcesinstall.esd -SourceIndex 10 -DestinationImagePath C:esdinstall.wim –CheckIntegrity
Convert ESD to ISO Using DISM++ (GUI)
If you don’t like using command-line tools, you can use the third-party graphical tool Dism++ to convert your ESD file. This is a simple and free utility for convenient manage Windows image and WIM/ESD files. Download and run the Dism++ tool (www.chuyu.me/en/).
- Select File > WIM > ESD/SWM file;
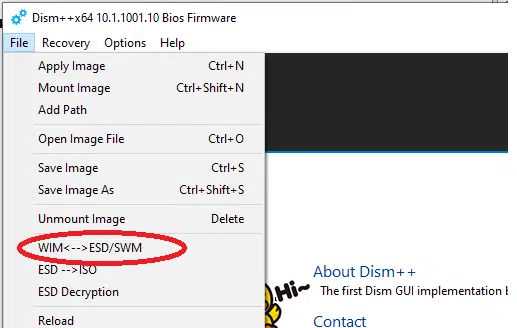
- Select your source esd file and target wim image path;
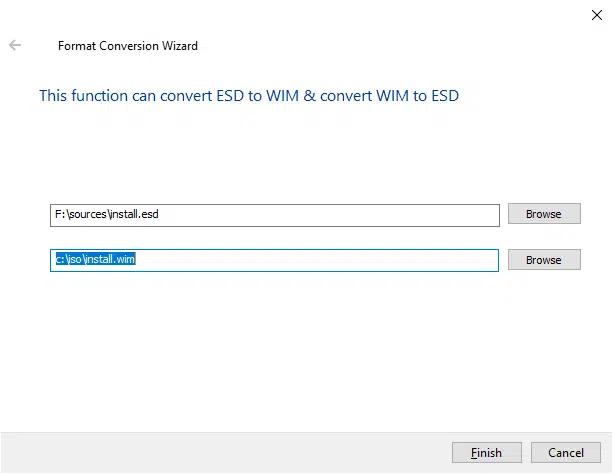
- Press Finish and wait until the converting process ends.
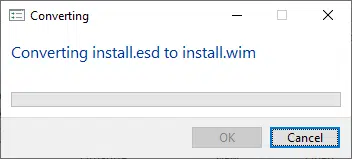
Hint. With DISM ++ you can also convert ESD or WIM file to Windows ISO image ready for deploying on computers.
How to Convert Install.esd to Install.wim using NTLite Tool?
NTLite is a popular tool for serving Windows images. You can use it not only to integrate driver files or updates into WIM, but also to configure the automatic installation of Windows and applications. One of the NTLite options allows you to convert ESD files to WIM format.
NTLite is free for non-commercial use. You can download it here: https://www.ntlite.com/download/.
To convert the install.esd from the Windows image to the install.wim format, run NTLite, and follow these steps:
- Select Add > Image file (WIM, ESD, SWM);
- Select your install.esd file;
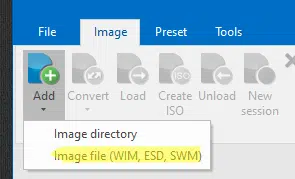
- Select the Windows edition in the ESD image that you want to export to a WIM file;
- Select Export > WIM in the context menu. Or click on the heading Operating System and select Export all > WIM;
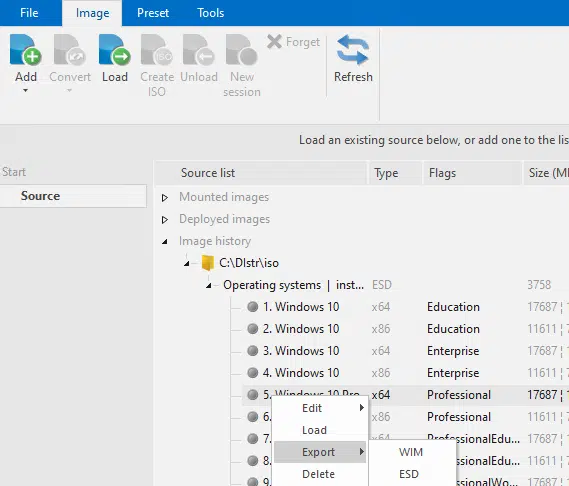
- Wait for NTLite to finish exporting Windows image from ESD file to WIM format. In my case, it took about 10 minutes.
The resulting install.wim file can be mounted using the DISM tool. You can slipstream Windows security updates into a .wim file, inject drivers, change Windows features, and make some other changes to the image. Now, you can use it to create your own Windows installation images and then import them to the MDT, WDS, or SCCM.
Convert WIM to ESD using DISM
In some cases, after making a change to install.wim, the size of install.wim can increase significantly. This can be a problem if you are using a FAT32 formatted USB flash drive (used to install Windows on UEFI-based computers). In fact, the maximum file size on FAT32 is only 4GB, and if your WIM file exceeds this limit, you will not be able to write it to a USB flash drive.
If this is the case, you can try to compress the WIM image using the LZMS compression method and convert it to an ESD file (this can reduce file size by around 30%).
In order to convert the install.wim file into the ESD format, use the following command:
DISM /export-image /sourceimagefile:install.wim /sourceindex:IndexNumber /destinationimagefile:install.esd /compress:recovery
Replace IndexNumber with the index of the Windows edition you want to save to the ESD file.
You can also split the original WIM into several smaller files using DISM. The following DISM command will split install.wim into several 3GB SWM files:
Dism /Split-Image /ImageFile:C:esdinstall.wim /SWMFile:C:esdinstall.swm /FileSize:3000
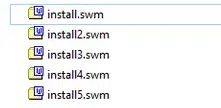
All we have to do now is to copy the SWM files into the Sources folder on your installation USB stick.



Leave a Reply